They're both cc designs stamps from last year. I finally got to use them and I think they're adorable! I love jojo the werewolf with his belly sticking out. I took this pic too early because I actually ended up using stickles on his clothes and stickles on the pumpkin. It really jazzed up the card a bit since I only used string an no rhinestones.
Sunday, October 6, 2013
2013 Halloween card series #5
Hello! It's getting late and I finished up a few more Halloween cards for my sis to give out to her friends. I kept them simple and used the same layout. I couldn't spend much time on them so here is what I had!
Saturday, October 5, 2013
2013 Halloween card series #4
I used my tiny attacher to staple the ribbon on the oval (which I also popped up). I used Martha Stewart's spider web corner punch and edged it all with vintage photo. I used puffed up paint and heat dried it and it made it look like perfect puffs in her cauldron. I sewed on the cute pink buttons and voila!
Friday, October 4, 2013
2013 Halloween card series #3
Here is card #3 for the season! I used alley way stamps again in this card. I love her stamps, they are so cute and creative. I had to have the witch feet for my collection! This was a simple card and I used my spellbinders circle dies to cut out the circles. I forgot to take a pic of inside the card but it has a few circles to tie in the outside of the card.
Thursday, October 3, 2013
Halloween card 2013 #2
Hello everyone, here is card #2 for Halloween. I used the Alley Way stamps on this card. I loved the zombie stamp from the set! It's a simple card and since its going to be mailed I didn't want to go crazy embellishing it.
Wednesday, October 2, 2013
Halloween cards 2013 #1
I made so many Halloween cards this year and have been forgetting to take pictures of them! Shame on me! On my second round of cards I finally got to take a few pictures of my cards. These aren't so detailed due to time constraints.
People need their holiday cards so I had to get them done asap! My first card is from Simply B stamps. I got he last year and finally used her this year. The sentiment is from an old stampin up set. My favorite sentiment stamp set : )
Monday, August 26, 2013
Halloween candy shoppe sign
I was so excited when I saw Stampin up's witches brew designer paper. One sheet in the pack is super cute so I decided to use it on this project! I got one of those 3 dollar frames from Walmart. It was the very last one. I didn't like it very much but now that it's all painted its perfect for this project! I cut out a part of the designer paper where it says witches candy shoppe. Super cute for a sign right?
Sorry for the glare in the pic. I'm a horrible photographer!
I painted it with a coat of white gesso and then sprayed lindys stamp gang chocolate truffle on it and rubbed it in a little bit for the aged look. Über vintage looking : )
I made paper flowers for the corner to dress up the sign a bit. I also added burlap behind the flowers.
Another piece of the paper had the word "open" on it so I cut it out to make an open sign. I punched holes in it and ran twine through it.
Tuesday, August 6, 2013
Vintage halloween banner
Since I'm on a vintage halloween kick, I decided to make some halloween decor! I wanted to make a banner that was more browns and softer looking.
So below I have a step by step tutorial on what I did. I wanted to make a video on it but I couldn't get my camera set up right. So I hope this helps for now!
I measure out a template I found online.
I made my first mark at 2 3/4", then 5 1/2" in between and another mark with 2 3/4" from the right side in.
Connect the dots!
I used my paper trimmer to cut perfect lines for the flags. I just cut them at an angle.
Then I placed my flag over patterned paper and traced it.
I wanted to use base card stock paper underneath the pattern paper to make it thicker.
So now glue them on top of each other.
I love using distress inks and my favorite color has to be vintage photo! I distressed the edges of each flag.
Next I cut out 1.5" strips of black card stock for my spider web edging.
They could be a bit slimmer but I like them wider so I can handle them easier in my punch.
I used my Martha Stewart spider web edge punch and punched my life away!
I made 3 strips per flag.
Then I used my color box pigment ink pad and rubbed it on the edges of my web strips.
I let the strips dry before I add vintage photo to the edges. This part gives my web edges a softer powder look. I didn't want to leave it stark white since the paper I used is off white. The vintage photo adds a touch of brown to them, I love it! Then I used my atg to adhere it to the edges.
Last part, I cut burlap circles out and then cut strips 1.5"x12 for my rosettes. I used my hot glue gun to make sure everything sticks!
I had black chipboard letters in my stash and so I painted them an off white. I used vintage photo on the edges as well and glued them on top of the rosettes.
I added extra wide grommets and strung through some twine. Voila! Quick and easy, super fun for Halloween!
Tuesday, July 30, 2013
Wonderland cards!
Ok I must be going through a phase right now, everything I make is alice in wonderland theme! I made these 3 cards using Greeting Farm's beans. They are limited edition and I finally got to use them. I made alice pink instead of her traditional baby blue.
Monday, July 29, 2013
My Vintage Halloween!
Hello everyone! I got one of those Tim Holtz clocks. I love the shabby chic look but wanted to do a vintage halloween theme. Originally I was going to do the classic black dark halloween look but since this clock will be sitting out year round, I thought I'd try something different. I like the vintage colors and wanted browns and creams in this. I painted the clock with 2 coats of gesso, then one coat of cream colored acrylic paint. I slapped some modeling paste on for some texture then sprayed it with Lindy's stamp gang chocolate truffle, Cadbury milk chocolate, and creamed brûlée starburst sprays. I love the shimmer!!! Once again I wanted to dive into my graphic 45 halloween in wonderland paper. This paper is the classifieds sheet so it was all cream and black. Perfect!!!!
I have some burlap inside the clock as well as some layered behind my prima flowers.
I used Tim Holtz clasp and rubbed some of that acrylic paint on it so it wouldn't be so plain bronze. The pocket watch was from michaels and key is TH. I used TH fragments with glossy accents to make the charm.
Key hole metal charm from TH and backed it up with scraps of the paper. I rubbed it with acrylic paint and sprayed it with chocolate truffle.
Fussy cut Alice and added mod podge on the back to give her strength.
I love making the drink me bottles with glitter. So cute!
Layer layer layer! I used TH rickety house die, odds and ends ticket stamp, prima flowers, and recollections bling.
Monday, July 22, 2013
Steampunk spells altered wooden box
Hi all! So I finally got to play around with graphic 45's steampunk spells paper collection. I decided to alter a wooden box I got from michaels a while back. I did some fussy cutting and made it a little more 3d. I made paper flowers and used my tim holtz gears die for embellishing. I also used tim holtz word play to cut out the numbers 45, for graphic 45 of course! The inside is still a bit empty, I'm working on my mini to go along with my box!
Wednesday, July 17, 2013
Sizzix's Prima flower die!
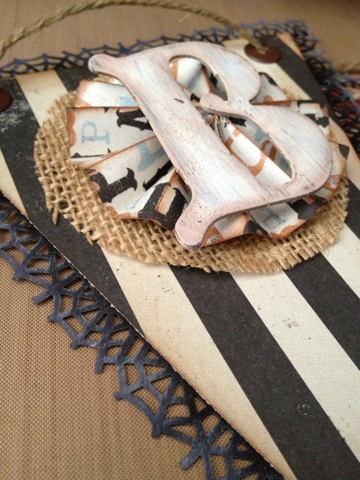
I was so excited Sizzix came out with Prima flower dies. Like most, I love all things Prima so I knew I had to have the new dies out. I'm pretty new to paper flower making so I was excited to try out the Prima flora grande die. It's a bigz L die so the petals are good size. There are 3 petals and a leaf which is perfect so I don't have to get a separate leaf die! I like using the middle size flower petal. It's larger than the middle flower on Tim Holtz tattered flower die. I cut it out 4 times since I like my flowers full. 3 works but 4 is better!
I made one then was immediately addicted to it. I decided to try a few more. One for my halloween mini I'm working on, then 2 smaller ones for the same mini.... Then a few more for future halloween projects!
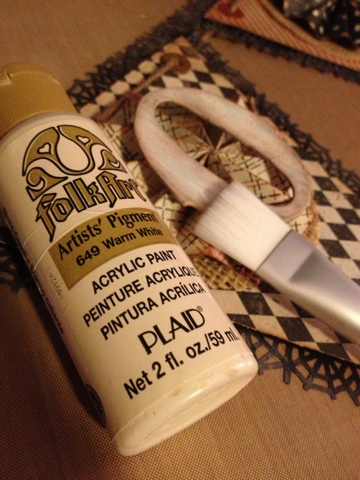
Here's what I used for my flowers. I brushed matte mod podge on the tops of the flower to give it more strength so they wouldn't tear when I rolled them around.
Testing it out but I realized I forgot to ink my edges on the flower before I began!
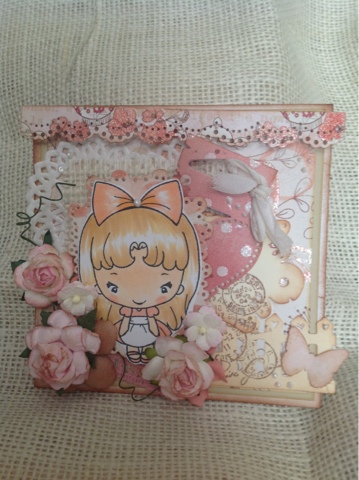
My 2 mini flowers with my larger one. The minis are around 1.25" and the larger is about 2.5"
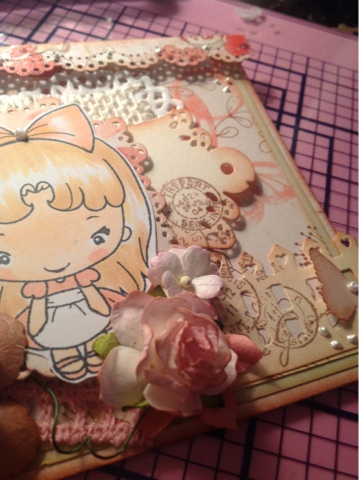
Here are 3 more I made! So much fun but next time I will use my hot glue gun to move it along faster.
Subscribe to:
Posts (Atom)